Chrome Web App Development Guide
I launched OhBoard, my little whiteboarding app, in 10 days. I took my idea-cranking shower on December 12th, and I made my first $3.99 on December 22nd. It was only 240 hours apart. Pretty cool, huh?
I then decided to carefully craft a development guide for you. If you are planning to make a Chrome Web App, you are in luck! Because after reading this guide, you can do what I just did and start taking advantage of this huge market ( 10% of all Internet citizens ) today!
Step 1: Come up with your idea
The listing on Chrome Web Store is still pretty small, nowhere near Apple’s App Store yet. So there are many things you can make.
I have a list of free, simple ideas you can consider using:
- An offline to-do list
- A text-based calculator
- A simple time tracking app
- A zen-mode text editor Also, before moving on, I recommend reading this article by two Chrome developer advocates: Thinking in Web Apps.
Step 2: Make your app
There are two different types of apps, hosted apps and packaged apps.
Hosted apps are regular web apps with a special file called manifest.json. Everything is hosted on your own server. But you have the advantage of gaining exposure on Chrome Web Store. When a user launches the app, they go straight to your site and that’s it.
Packaged apps, on the other hand, are apps that users download from the Web Store and save into their own computer. All packaged app content are made out of HTML, CSS and JavaScript. So if you have knowledge about them, you can get started making packaged apps very easily. PS: OhBoard is a packaged app.
Chrome supports all native HTML5 features. In OhBoard, I use local storage that saves all your drawing in local computer and it is available at all time. Besides, you can also take advantage of geolocation, desktop notifications, and many more.
Step 3: Create manifest.json
Manifest.json serves as the manual for your app. It tells Chrome the name, description, version, icon location, etc. Most importantly, it tells Chrome what page to open when a user launches the app. You can also give your app different permissions such as unlimited storage, geolocation, desktop notification, history, bookmarks, cookies and more.
Here is OhBoard’s manifest.json:
{
"name": "OhBoard",
"description": "A ridiculously simple whiteboard app for Chrome. Great for wireframing, sketching, diagramming, brainstorming, and doodling.",
"version": "1.1",
"app": {
"launch": {
"local_path": "index.html"
}
},
"icons": {
"16": "favicon.png",
"128": "logo.png"
},
"permissions": [ "unlimitedStorage" ]
}
Step 4: Create your icon
You need two icons. The first one is 128x128px, it is used on your app page, and it also represents your app on the new tab page. The second one is 16x16px, better known as favicon. It stays in the title bar and gives people a visual way to identify different tabs.
There are few guidelines Google wants you to follow:
- Don’t put an edge around the 128×128 image; the UI might add edges.
- If your icon is mostly dark, consider adding a subtle white outer glow so it’ll look good against dark backgrounds.
- Avoid large drop shadows; the UI might add shadows. It’s OK to use small shadows for contrast.
- If you have a bevel at the bottom of your icon, we recommend 4 pixels of depth.
- Make the icon face the viewer, rather than having built-in perspective. Wherever you place both icons in your package, you must specify the locations in manifest.json (as mentioned above).
Step 5: Make your screenshots
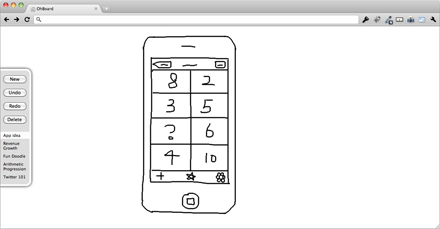
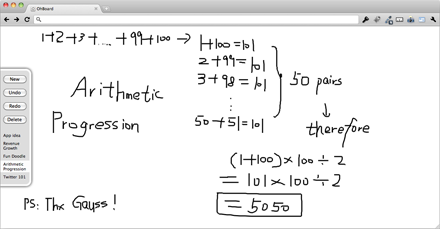
Picture is worth thousand words. So making your screenshot correctly will increase your sales. Each screenshot is 400x275px.
Take a look at a few I did:


Few tips to keep in mind: The screenshots should only do 1 thing: show what your app looks like. Many people made the mistake of adding captions and putting testimonials and writing features and telling your Twitter handle. But you have the description field for that. Just show what it looks like so user can get a visual understanding.
Also, make sure you don’t break Google’s rules!
Step 6: Make your demo videos
Video is worth thousand pictures, too! If you want to save money, you can make a DIY video yourself using these powerful tools:
- Screenflow (the one I’m going to use)
- Camtasia
- iShowU
Captivate Or if you want your app to look cutting-edge, consider contracting with agencies that makes professional demos. Few media producers that have done work for high-profile apps:
- Clear Media
- SwitchMarketing
Step 7: Write your descriptions
If your screenshots and video aren’t that good, a golden description can still turn it over. Here are 3 well-known tips:
- Keep it simple. Most people aren’t going to have time to read a 5-paragraph description. So the rule of thumb is to keep it as short as possible. Just tell what benefits and features do the app provide.
- Use bullet points. Since people won’t read paragraph, listing benefits and features in bullet points will be a great idea.
- Showcase testimonials. Maybe users don’t trust what you have to say, listing your customer’s testimonials can be a convincing call-to-action. Take a look at mine for an example.
Step 8: Set your price
As always, there are two ways to go: free or paid. But in Chrome Web Store, there are actually 5 payment choices you can use.
- Free. If you are new to create a Chrome Web App, releasing it for free and learn from experience won’t hurt you.
- One-time payment with Google Checkout. Great if your app provides utility, meaning it saves users time or money.
- Recurring paymentwith Google Checkout**. This is perfect if your app involves any types of file storage.
- Free trial. If your app is complicated, giving a free trial then charge for a fee will be the best solution, although only hosted apps support free trial at this point.
- Your own payment method. If you don’t want to use Google Checkout, you can always write your own system that processes payment via PayPal. I found a detailed but pretty technical tutorial from Google about how to check for payments using their licensing API. Note: it only applies to hosted app because packaged apps only supports Google Checkout.
Step 9: Test the app
After you’ve finished making your app, you can easily test it out locally in Chrome. Window => Extensions => Developer Mode => Load unpacked extension… => Choose your app folder.

- Open up a new tab, you should see your app icon showing on the dashboard! If it is packaged app, make sure everything within the app is working bug-free. If it is a hosted app, as long as the icon links to your destination website, you should be fine.
Step 10: Publish the app
Before moving on, make sure you completed all of the pre-launched checklist items!
Once everything is done, you can log in to your developer dashboard with your Google account to publish your app.
The procedure is fairly straightforward:
- Choose Add new item button
- Compress your app folder (with manifest.json and your icons) and upload the .zip.
- Fill in all the necessary information about your app. This includes price, categories, language, long description, Google Analytics (optional), links, ratings, etc.
- Upload all artwork. This includes screenshots & videos. You also have the ability to add default background & promotional items for the front page.
- Preview the listing
- Pay $5 one-time developer fee
- Publish the app
Conclusion
If you survived all the way to the end, great job! :) My lengthy tutorial should cover up all the basic about making your own Chrome Web App as well as any relevant links I can find from Google about this process.
In the future, I will continue to write more in-depth tutorials on more specific topics, so feel free to subscribe to this blog.
I also suggest that you join Google’s Chrome development group so you can keep up with everything and ask any questions.
If you have any more questions, feel free to email me via Email, Twitter or comments.
And lastly, if you enjoy this tutorial, you will really love OhBoard as well, give it a try!
/If you are interested in keeping up with OhBoard and Stephen, subscribe to the blog & follow on Twitter!/